Setting Up Eclipse for Android Development with Google Maps &
How to Install Apps and Run them Directly On the Emulator &
How to Correct the INSTALL_FAILED_MISSING_SHARED_LIBRARY Error !

|
Setting Up Eclipse for Android Development with Google Maps & How to Install Apps and Run them Directly On the Emulator & How to Correct the INSTALL_FAILED_MISSING_SHARED_LIBRARY Error ! |
|
1) Eclipse Java IDE
|
|
2) The Android SDK
|
|
3) The Android ADT Plugin
|
|
4) Install #1 Eclipse
a) Extract and place files where you want your IDE
to be.
b) Go to folder and double click on the Eclipse icon
[blue]
c) Define your folder where your default projects
will be
I use:
C:\root\Eclipse Java Projects\
d) Eclipse will then auto initialize itself
|
|
5) Install #2 The Android SDK
Simply extract to a working path
|
|
6) Install #3 ADT Plugin
a) This is done from directly from Eclipse.
b) Depending on which version you are
installing follow these instructions to install:
c.1) For Galileo do the following:
Start Eclipse, then select Help > Install New Software.
c.2) For Ganymede do the following:
|
|
7) SET YOUR PREFERENCES !
Select Window > Preferences... to open the
Preferences panel (Mac OS X: Eclipse > Preferences).
|
|
8) Install all of the Android SDKs and Google Maps APIs
Select Windows > SDK and AVD Manager
Ganymede
[I believe the standard SDK contains these APIs]
Galileo
Select Available Packages
Select all packages
Download
Install selected
go eat brunch, lunch or dinner
Note: Sometimes all the packages selected will not install. The work around for this is to install one or fewer packages at a time! Make sure before exiting this step that all packages are installed ! |
|
9) Set up a specialized emulator for Goggle Maps
Select Windows > SDK and AVD Manager or
Android AVD Manager
Ganymede
a) In the Name field enter in the text "AndroidMapDevice"
b) From the Target drop down list select "Google APIs Level 7
Galileo
a) Select the New Button
b) In the Name field enter in the text "AndroidMapDevice"
c) From the Target drop down list select "Google APIs Level 7
d) For the SD Card size enter in 200 Mb
e) Press the create AVD button
|
|
10) Run Any Application in the emulator
The apps are pushed into APK files which are
like CAB files in the Windoze world.
a) From Eclipse launch the emulator from the by:
b) Select Windows > SDK and AVD Manager
c) Select the emulator defined, press the start
button
[alternative method]
Now navigate to the $SDK_ROOT/tools directory and
execute the emulator.
This is the Android emulator itself. Depending upon
your development device, you may need to wait couple of minutes until it loads.
emulator -avd AndroidMapDevice
d) Download and save locally a APK-file which you
want to install/evaluate on the emulator.
recommend to save the APK file directly in the tools
directory. [android-sdk_r04-windows\android-sdk-windows\tools]
e) From the tools directory type-in the following
command using the android debug bridge:
for the latest SDK this is [android-sdk_r04-windows\android-sdk-windows\tools from a command line prompt. adb install APP.APK where APP.APK is the name of the APK file. You could also build a batch file to do this like the following: adb install -r app.apk pause
f) Select menu on the emulator device, and press the
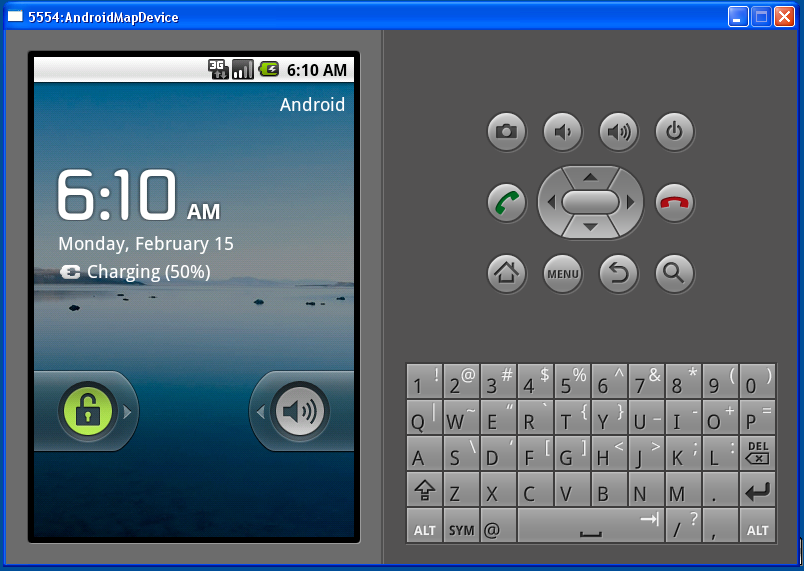
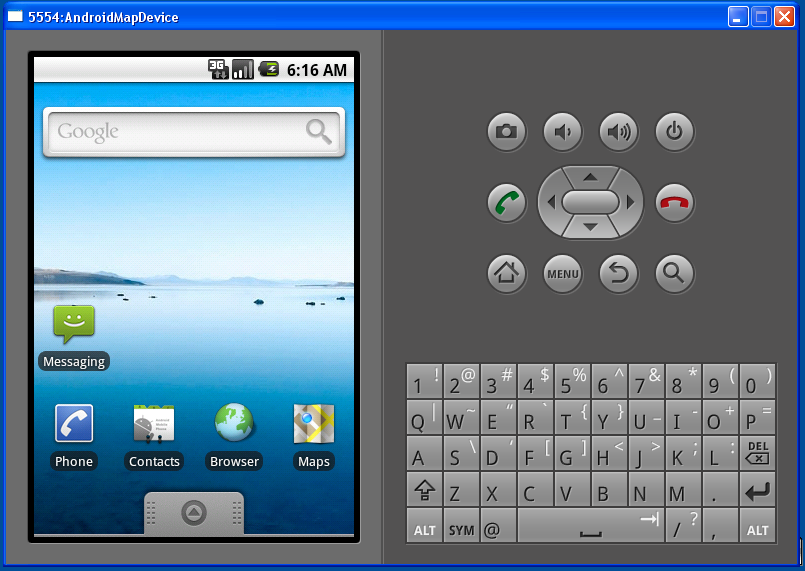
middle up arrow on the center of the device [Image 1, 2]
g) The app you installed will be in the client area,
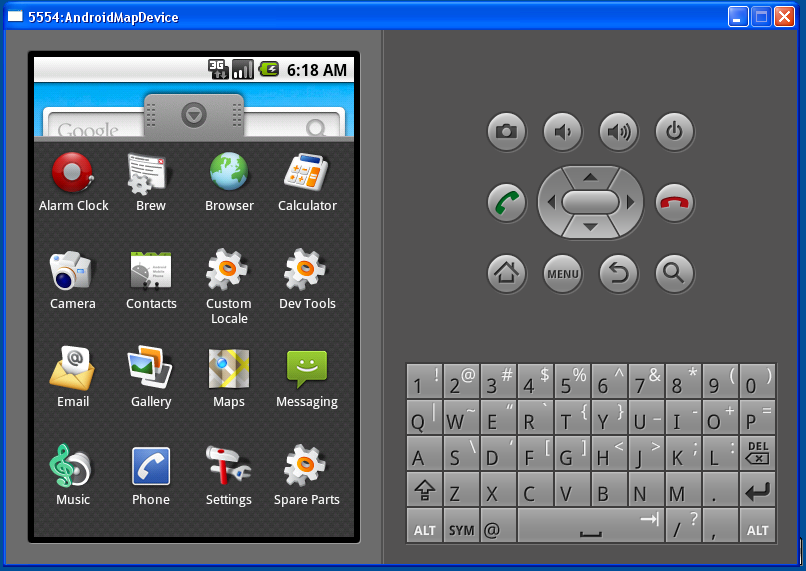
select in the client area the app runs [Image 3]
[Note: if you receive an error
[INSTALL_FAILED_MISSING_SHARED_LIBRARY], you need to go back and confirm that
you installed all of the run time libraries. Go back to step 8 and verify that
all available packages have been installed.
If you install more libraries you must then
delete your emulator and re-create a new one. Delete your emulator and
repeat step 9 and then onto step 10 again !]
|

Image One - Android DDMS/ADT 0.9.5.v2009111191123-20404 Emulator on Start up

Image Two - Android Emulator - Main Screen

Image Three - Android Emulator - Viewing Installed Applications
Setting Up Eclipse for Android Development with Google Maps
Feedback/Contact paulzazzarino@3zwireless.com .
Copyright 2010 3zwireless Ltd, This page last updated on 02/2010